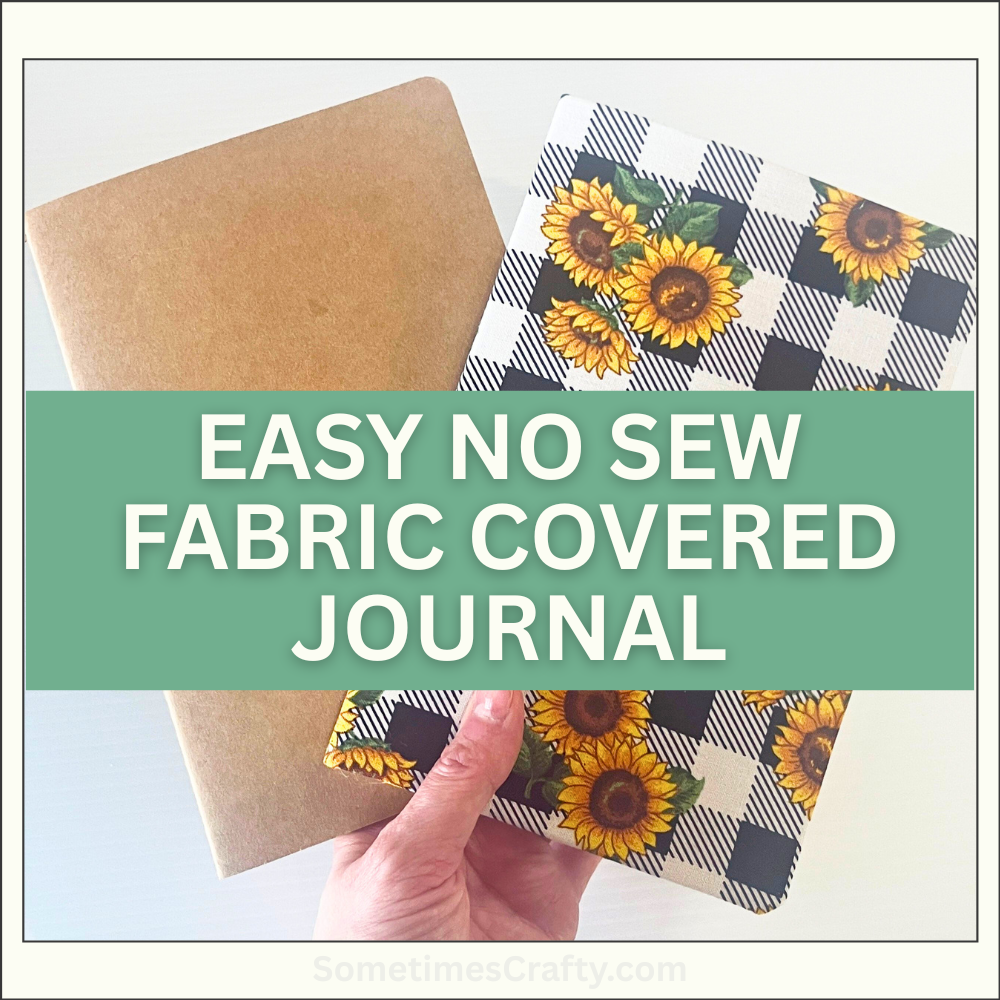
Easy No-Sew Fabric Covered Kraft Journals (Beginner Friendly)

There’s something oddly freeing about a small notebook.
Not precious. Not expensive. Not intimidating.
I recently fell down a rabbit hole with these little kraft journals, and I just ordered more because they solve a problem I didn’t realize I had: I want to write things down, but big, beautiful notes and journals make me freeze.
These don’t.
They’re inexpensive, a great size, and easy to customize so they actually feel uniquely yours. And because they’re small (60 pages), you don’t feel guilty starting a new one just for a single topic, season, or idea. (And they make great gifts!)
Why I Love These Little Kraft Journals
Before we get into the how, here’s the why, because this is the part that converted me.
-
Low pressure – They don’t feel “too nice” to write in
-
Perfect size – Big enough to matter, small enough to finish
-
Affordable – You can keep multiples without overthinking it
-
Flexible – One notebook per topic, theme, or season
-
Creative – Easy to personalize without special tools
I use mine for:
-
Commonplace notes
-
Project ideas
-
Seasonal planning
-
Creative brain dumps
-
One-off topics I don’t want cluttering a main journal
If you’ve ever avoided writing because you didn’t want to “mess up” a nice journal…this is your permission slip.
In this tutorial, I’ll show you how to customize a basic kraft journal using fabric, no sewing required.
Affiliate links have been included below for your convenience.
Supplies
Base Materials
-
Kraft Journal/Notebook – (I like this lined version, but there are other options – blank page, grid/graph paper)
-
Fabric of your choice (You can also cover these with printed vinyl, scrapbook paper, or stickers)
Tools/Assembly Helpers
-
Scissors or rotary cutter
-
Cardstock
- Straight edge
-
Glue or Adhesive – I used Fabri-Tac and Basting Spray
-
Squeegee or credit card
- Iron
Step-by-Step: Fabric Covered Journal (No Sewing)
1. Gather, Cut & Prep Your Materials
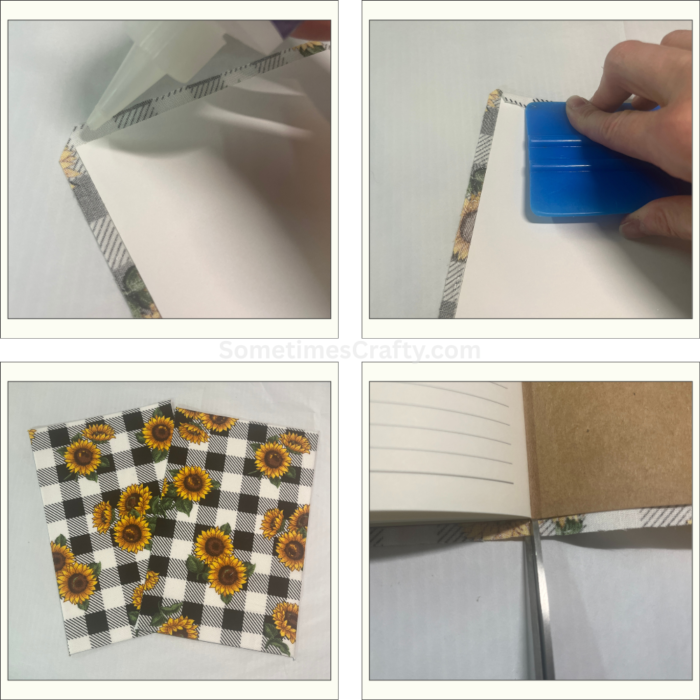
Lay the journal open on the wrong side of the fabric and cut around it, leaving about 1/2 inch of extra fabric on all sides. (I only left about 1/4″ at first, and I recommend leaving a little more. If your fabric wrinkles easily, give it a quick press with an iron. This helps everything lay flat later.
Cut two pieces of cardstock to fit the inside covers of the journal.
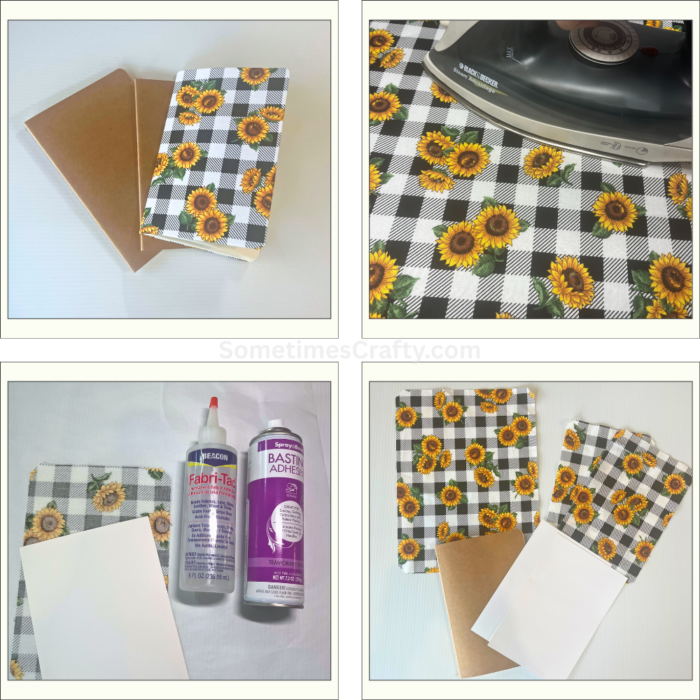
2. Cover Cardstock Inserts and Kraft Journal with Fabric
Placed the fabric face down, wrong side up. Sprayed basting spray on the fabric and press cardstock insert onto the center of the fabric. Carefully turn the edges of the fabric, securing with fabric-tac around the edges.
Using the same method, do the same with the kraft journal. Cut a little notch at the top and bottom center to allow for pages.
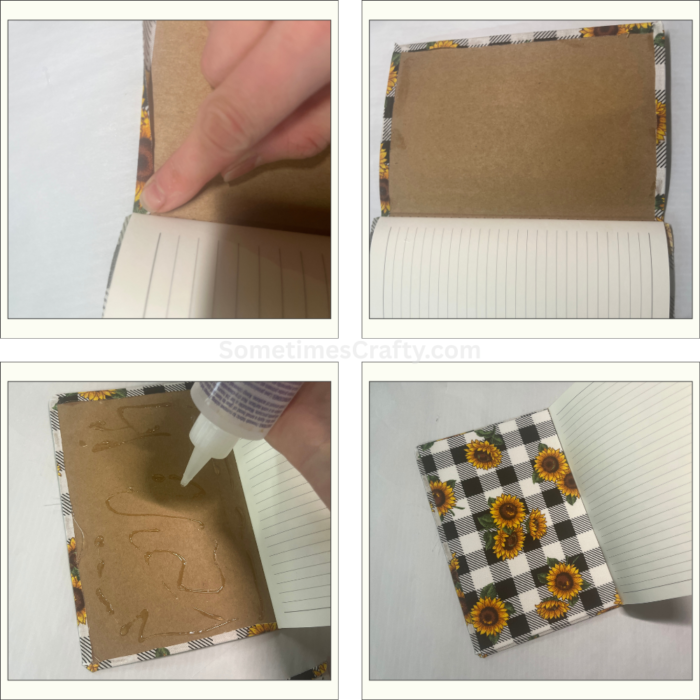
3. Attach Cardstock Inserts
Once the outside edges of the fabric have been secured on the journal, add Fabric-Tac to the inside cover and glue the fabric covered cardstock to the inside front and back of the journal. This hides raw edges and gives the notebook a finished look.
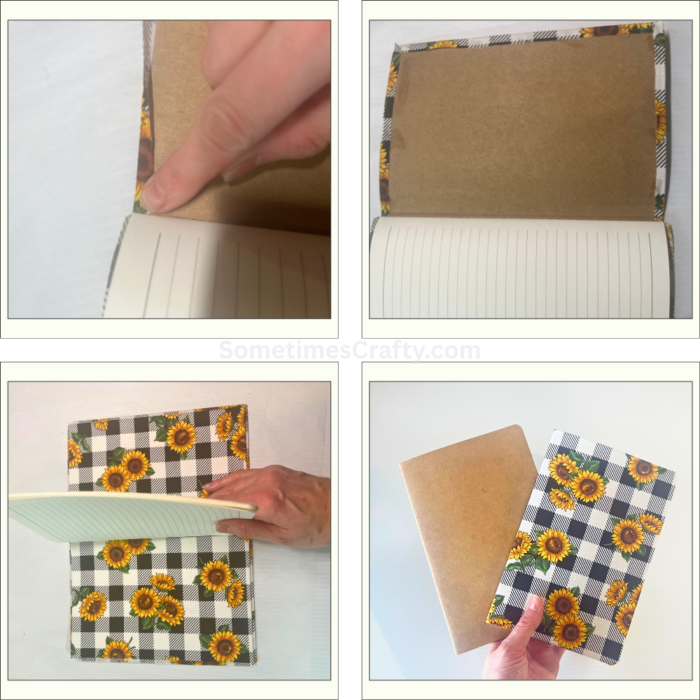
4. Let It Dry
Close the journal and place something flat and heavy on top while it dries to prevent warping.
Once dry, you’re done.
You now have a completely customized notebook!
Customization Ideas
This is where these journals really shine.
-
Seasonal fabrics (fall, holiday, summer)
-
Minimal linen or solids
-
Vintage prints
-
Matching sets by topic
-
Labels or vinyl titles on the front
-
Different fabric inside vs outside
Don’t want to use fabric? Try vinyl prints or scrapbook paper, or cover in stickers! Because the base notebook is inexpensive, you can experiment without stress.
Final Thoughts
I absolutely LOVE these little journals! They removed the pressure, and invited me to write instead of stress about being perfect.
If you’ve been avoiding journaling, planning, or note-keeping because “the notebook felt too important,” try downsizing the commitment.
These are small, inexpensive, and can be custom designed to your needs. Or, leave them plain!
You might also like: How to Make a Custom Spiral Notebook
📌 Don’t forget to pin this for later: