
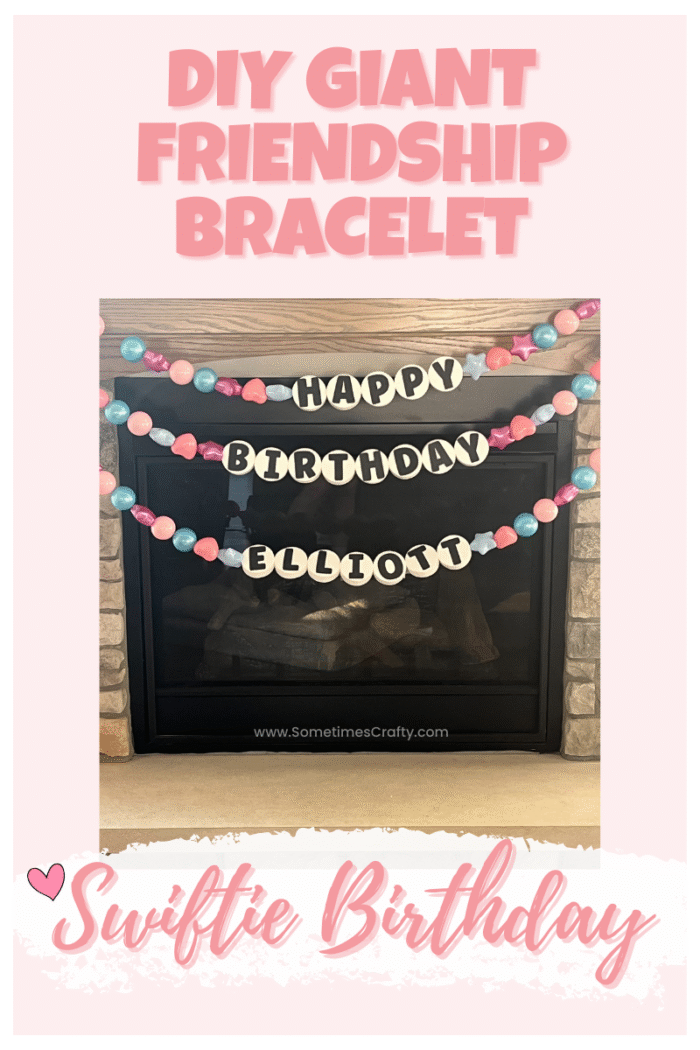
What Swiftie wouldn’t love a friendship bracelet birthday banner?? When my daughter turned 13, I knew I wanted to do something extra special — and extra her. As a full-blown Swiftie, she’s obsessed with all things friendship bracelets lately. So when I stumbled upon giant versions on Pinterest, they practically screamed, “MAKE ME!”
For your convenience, some of the links in this post are affiliate links.

Full credit to the crafty original creator who (to my knowledge) is Abby Peek.
You can see her Amazon shopping list here.
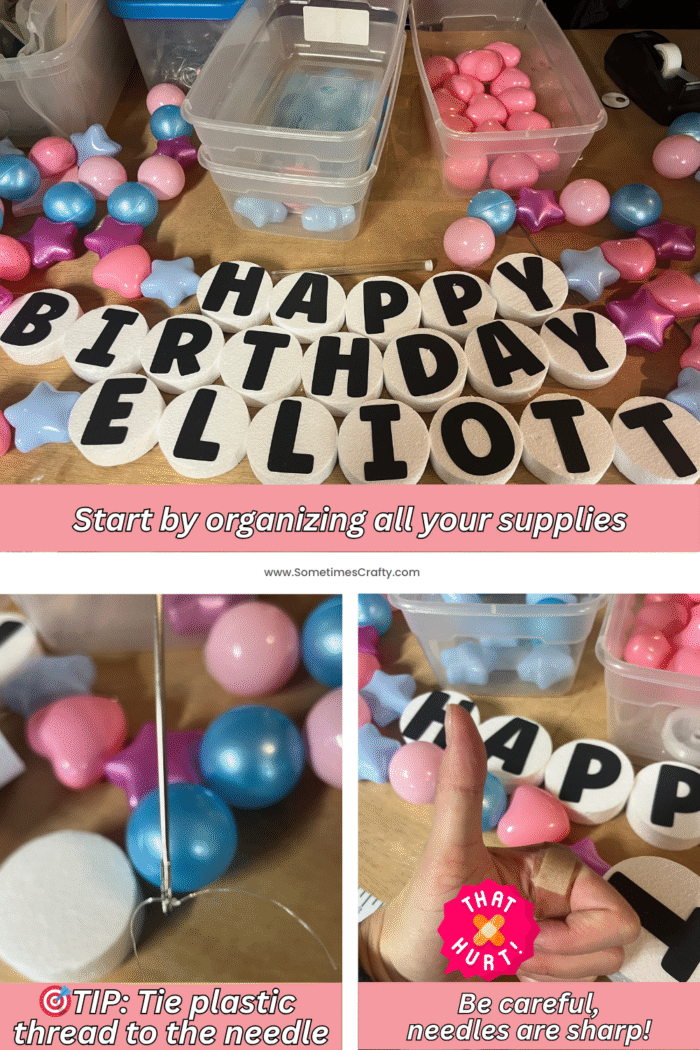
For our friendship bracelet birthday banner, I chose pastel plastic balls that came with hearts, stars, and I went with a kit that came with 3″ Foam Circles + Clear Elastic + Sticker Letters + 6″ Needles from Amazon. I didn’t like the stickers that came with it though, so I printed my own. I made my letters 2.5″ tall, and the were just a tad too big, I think. If I were to do this again I would make them 2.25″.
🛍️ What I Used:
- Plastic pastel beads in fun shapes: hearts, stars, and classic round beads
- Foam discs (mine were about 3″ wide)
- Black vinyl for the letters
- Clear elastic cord
- A ridiculously large needle (6 inches long!)
- Painters Tape
- A few quarters
- Patience
🧵 Assembly Tips:
- Working with clear elastic cord was not that fun. That stuff loves to twist and vanish into thin air. I tied it to the needle (and it still came undone a few times! It helps if you have a long space to lay everything out in a line so it doesn’t get twisted.
- That huge needle was a game-changer for stringing everything together — though I did manage to stab myself once. #CraftingBattleScars
- When I had all strands to my liking I taped the elastic to the last plastic ball/bead and left PLENTY of extra line on each end, just in case.
- It helps to have a partner when adding to your mantel…did I mention how annoying this clear elastic can be?! LOL It can easily get twisted and it’s not fun to untangle.
- If I could go back, I might have added one more color to the bead mix just to break up the palette a bit. But honestly? It turned out super cute anyhow.
🎯 Friendship Bracelet Birthday Banner Hanging Hack:
Here’s a little trick I figured out to keep everything hanging straight:
Tape a quarter (or washer) to the back of the center foam disc on each strand.
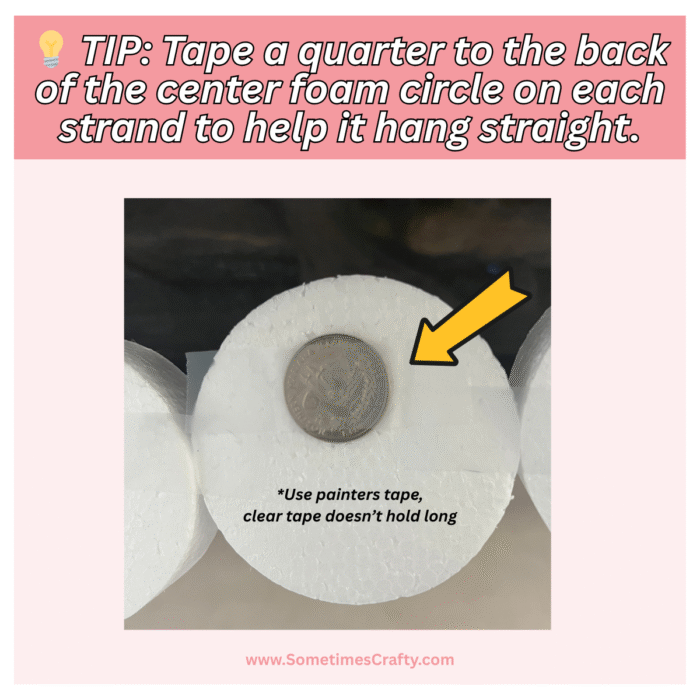
That extra weight helps the foam stay centered. Painter’s tape held the quarters perfectly for several days — the clear tape didn’t last very long.
Final Thoughts on the Friendship Bracelet Birthday Banner💕
Whether you’re planning a Swiftie-themed party, a birthday sleepover, or just want to try something super crafty and unique, this banner totally steals the show. Plus, it’s reusable — just change out the letters for your next event!
FAQ
[sc_fs_multi_faq headline-0=”h2″ question-0=”What size should the foam circles be?” answer-0=” I used 3-inch foam circles, which work great with 2.25in – 2.5in vinyl letters” image-0=”” headline-1=”h2″ question-1=”Where can I get the supplies for this project?” answer-1=” I used a mix of Amazon kits and supplies I already had on hand. You can find a great starter kit linked in the post.” image-1=”” headline-2=”h2″ question-2=”How long did it take to make?” answer-2=”Once everything was sorted and prepped, it took about 45-60 minutes to assemble the full banner. I actually worked on it little by little as I had time.” image-2=”” headline-3=”h2″ question-3=”Can I reuse the banner?” answer-3=”Yes! You can easily swap out the letters for different names or events.” image-3=”” count=”4″ html=”true” css_class=””]
🎈 You Might Also Like:
- Moana Theme Birthday Party Ideas – Ocean-themed fun with DIY decor
- Daniel Tiger Birthday Party Ideas – Sweet & simple toddler-friendly celebration
- Doc McStuffins Birthday Party Ideas Easy ideas for a kiddo who loves pretend play
📌 Don’t forget to pin this for later:
Leave a Reply